Manual VPN connection setup with L2TP VPN on macOS was simple and with the new macOS version (macOS 13.0 Ventura and newer) and its settings changes, the process became easier.
Since the L2TP protocol is integrated into the macOS settings, you can connect to the VPN using the L2TP VPN configuration without installing a third-party app. Simply follow the instructions below to create a manual VPN connection on your Mac, iMac, and MacBook devices.
💁 If you have any problems, questions, or request, please contact our technical support service at support@seed4.me.
Step 1.
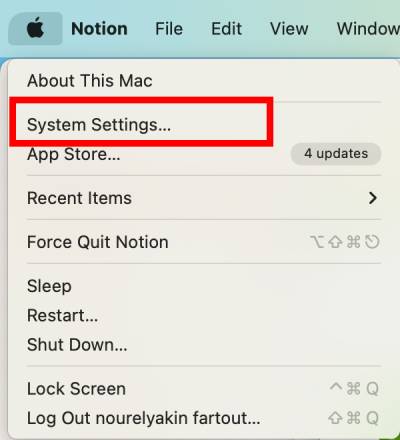
Click on the Apple symbol at the top left of the screen and Choose System Settings…
Step 2.
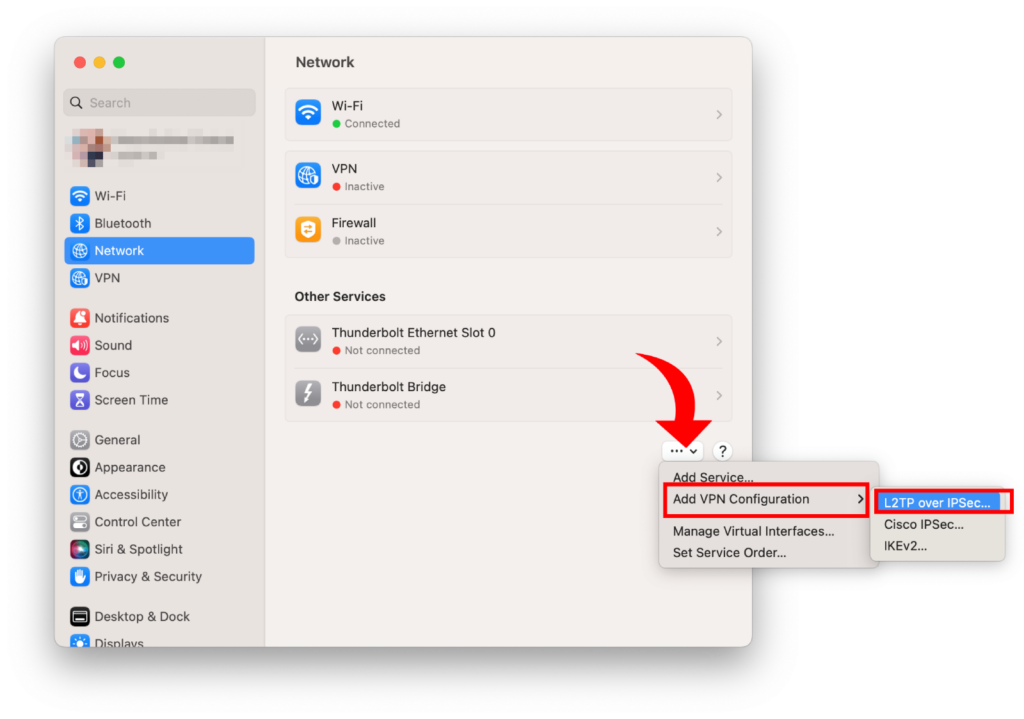
In the opened window choose Network from the left tab and click the 3 dots at the bottom-right, choose Add VPN Configuration > L2TP over IPSec to create a new L2TP VPN connection.
Step 3.
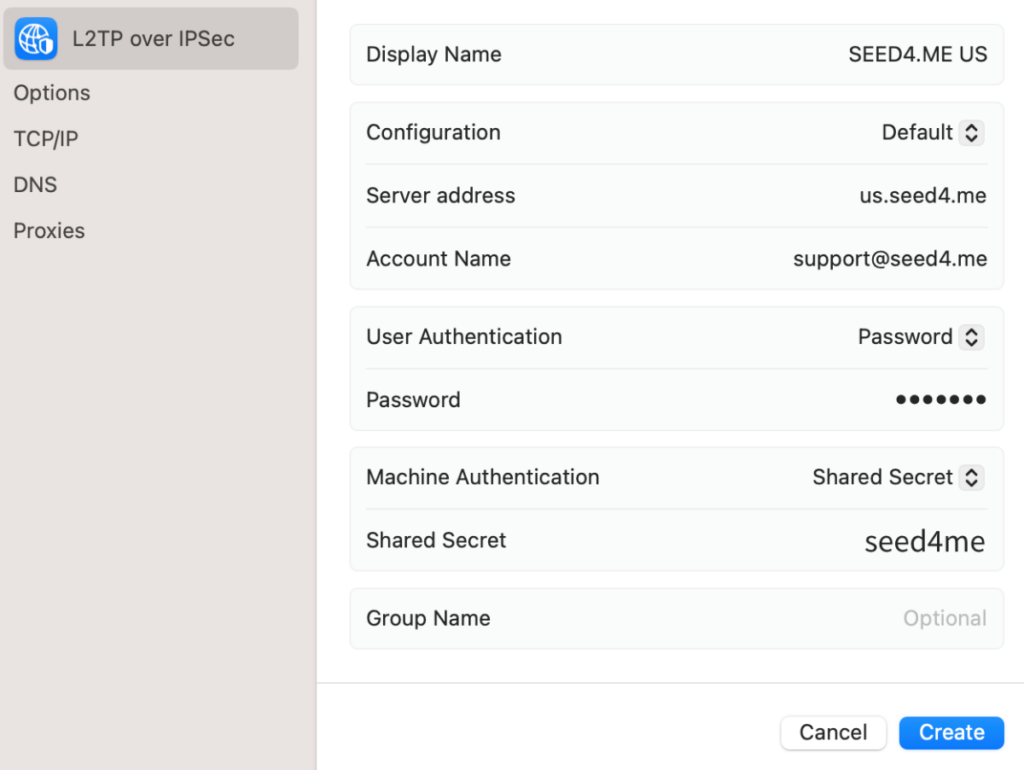
In the opened window, fill in these fields and leave the others as they are by default:
- Display Name: SEED4.ME US – could be any name, it’s up to you
- Server address: us.seed4.me – the list of all available servers can be found on My VPN Access page
- Account Name: Your Seed4.Me E-mail
- Password: Your Seed4.Me Password (If you forgot your password, your can request a new one here)
- Shared Secret: seed4me
👉 Note that us.seed4.me is the server name you are looking to connect to, it can be replaced by any other server like:
- ru.seed4.me for Russia 🇷🇺
- uk.seed4.me for United Kingdom 🇬🇧
- fr.seed4.me for France 🇫🇷
When you are done filling in the fields, click Create button to save the configuration.
Step 4.
In the Network window, open the VPN tab and turn the created VPN on by clicking on the toggle button as in the image below.
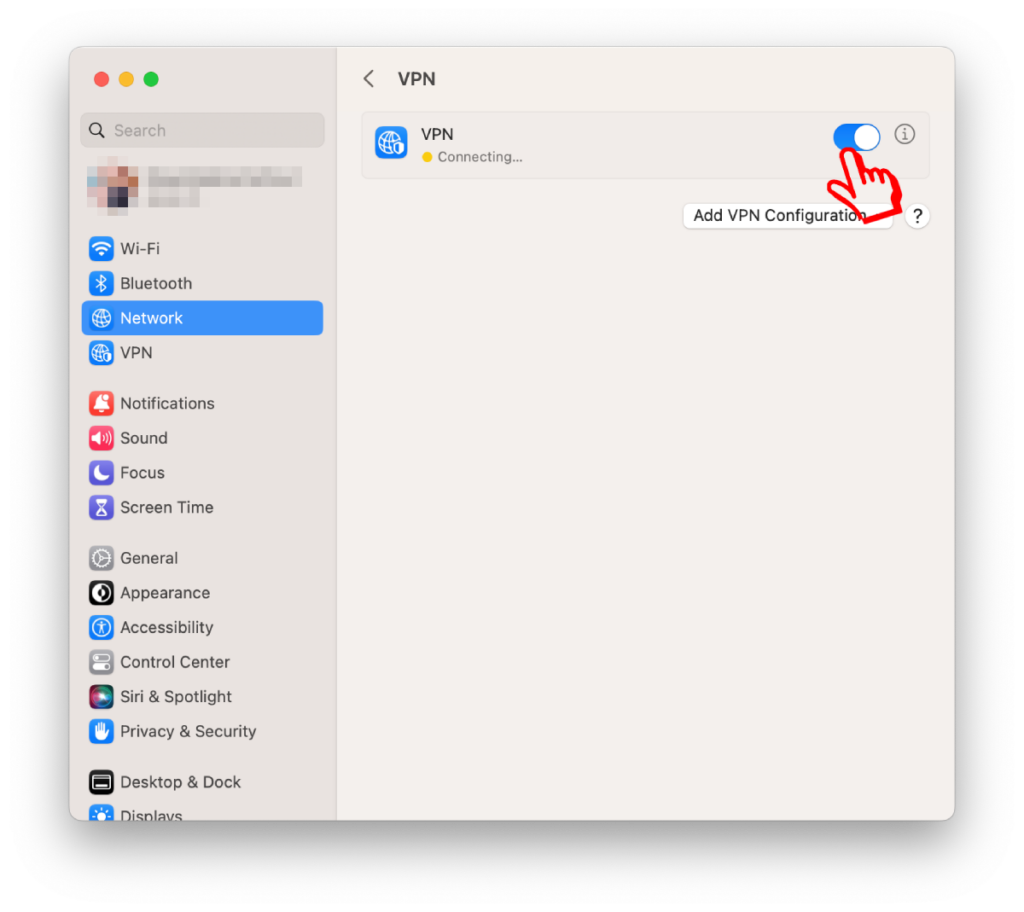
The status will change from “Connecting…” to “Connected” and you are now done with your setup!
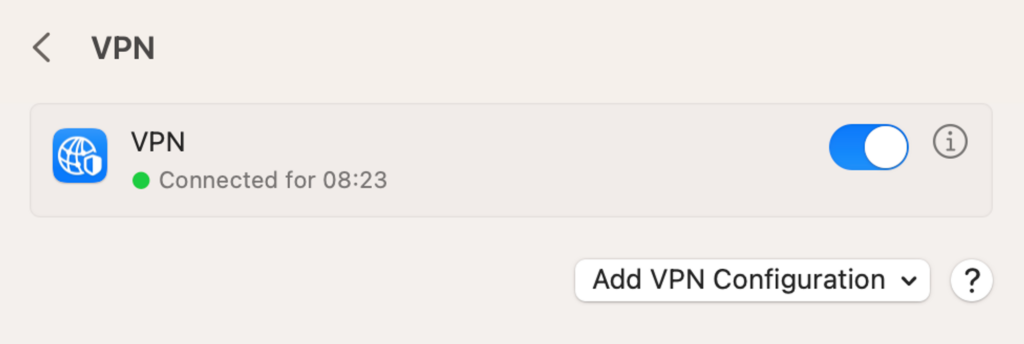
You can check if the VPN is working by visiting this website and checking your virtual location:
If you have any further questions or problems, don’t hesitate to contact us at support@seed4.me.
