Windows 11 is the latest version of Microsoft’s operating system. It’s packed with some great features and visual changes that make it a pleasure to use.
Like Windows 10, there are many ways to set up Seed4.Me VPN on Windows 11. The easiest way is to install Seed4.Me VPN client that can be downloaded here. However, you can connect to VPN manually using L2TP VPN configuration on Windows 11. You can do so by following these steps:
Step 1.
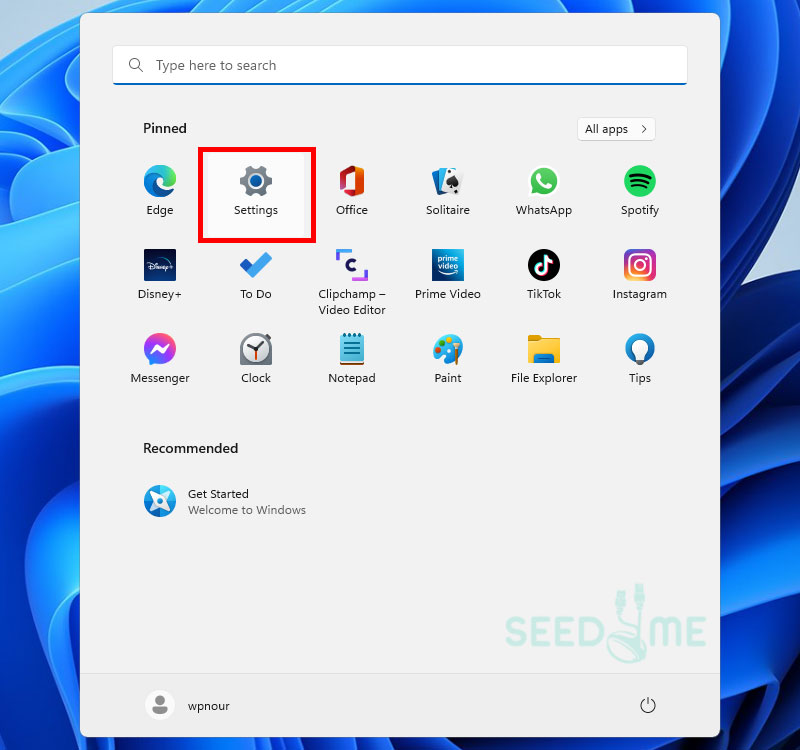
Click on the Start button, which should be in the center of your taskbar, and Select Settings.
Step 2.
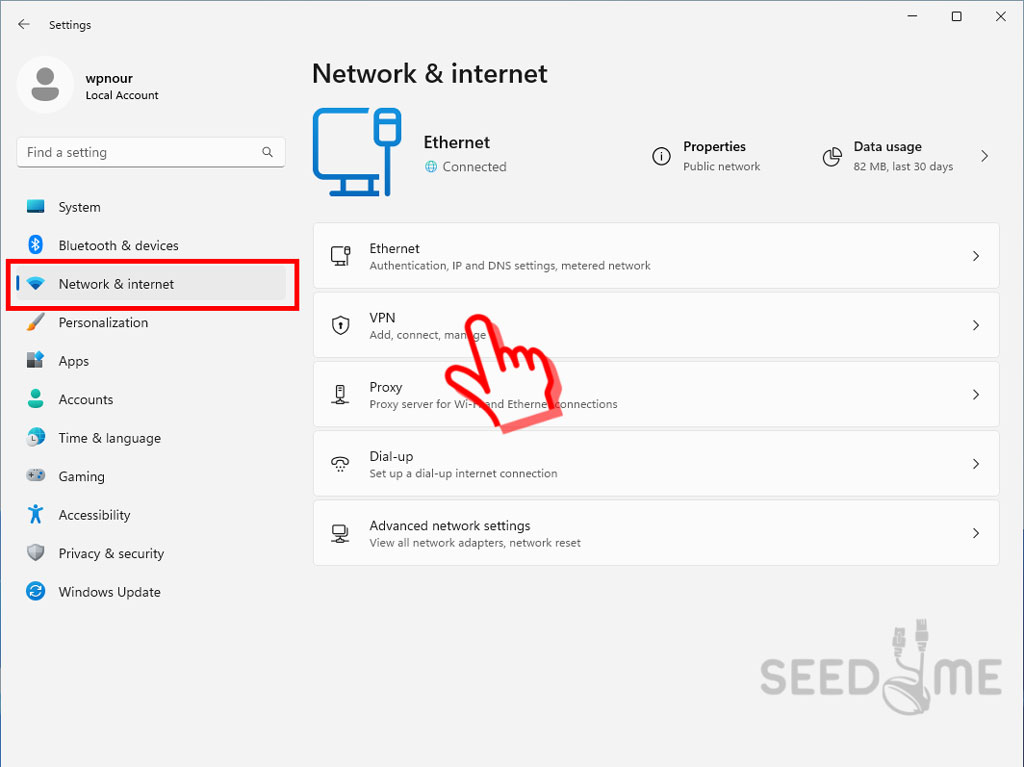
From the menu on the left side, select Network and Internet, then click VPN
Step 3.
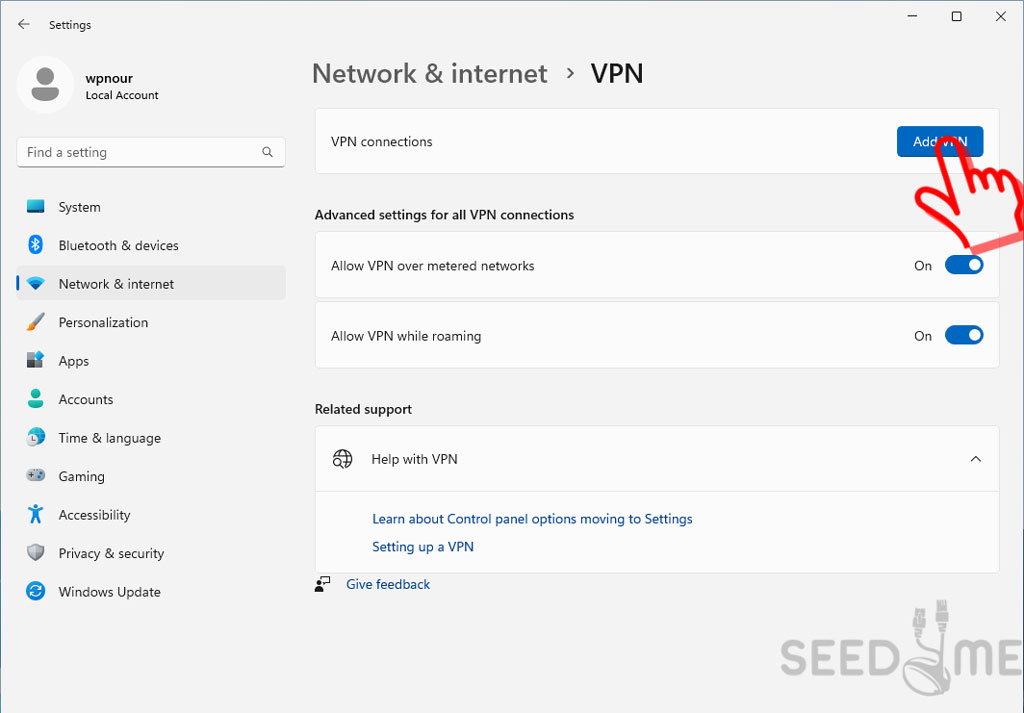
Click on the “Add VPN” button to create a new VPN Configuration on your PC.
Step 4.
The following form will bring up, fill in the necessary details in the dialog box and Click Save:
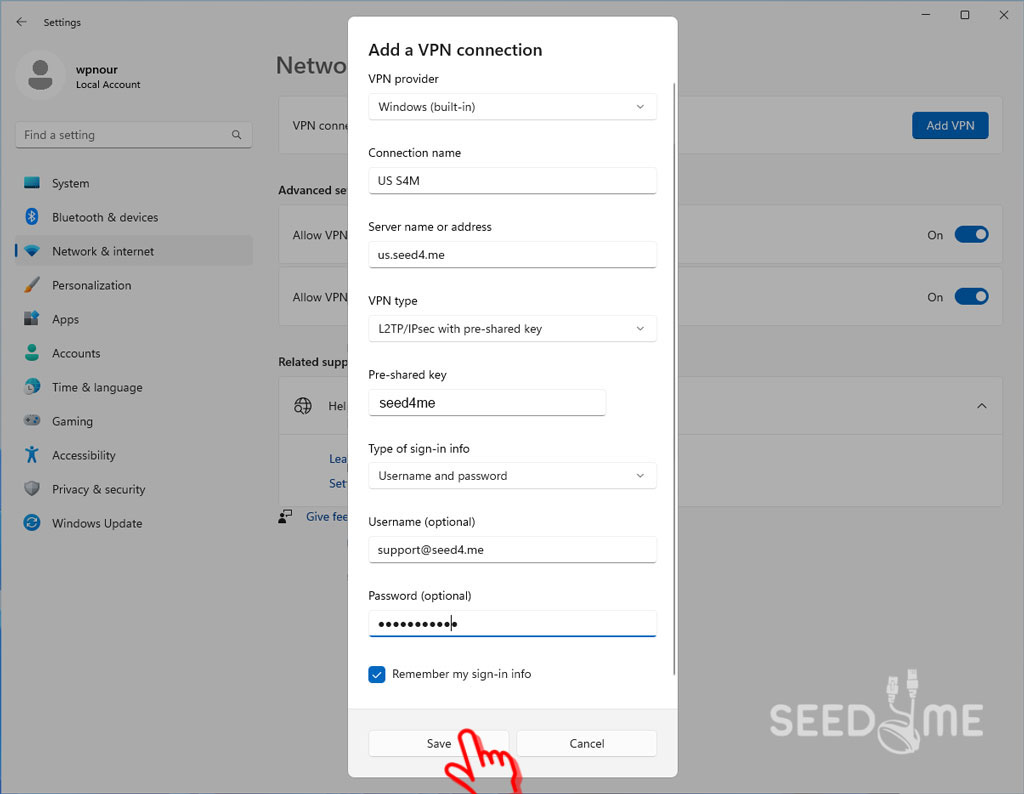
- VPN provider: The default selection is Windows (built-in).
- Connection name: It’s the name used to identify this VPN Config. Just name it whatever you like.
- Server name or address: The server name of the country you want to connect to, for example:
- us.seed4.me for the United States 🇺🇸
- ru.seed4.me for Russia 🇷🇺
- uk.seed4.me for the United Kingdom 🇬🇧
- fr.seed4.me for France 🇫🇷
👉 The list of all available VPN servers can be found on My VPN Access page.
- VPN type: L2TP/IPsec with Pre-Shared Key
- Pre-Shared Key: seed4me
- Username: Your Seed4.Me VPN Account (e-mail address)
- Password: Your Seed4.Me VPN Password (If you forgot your password, your can request a new one here)
- Check the Remember my sign-in info box to save your info, so you can connect to this VPN server easily when needed.
Step 4.
On the right side of the configuration, you created, click the connect button and wait till the connection is established.

That’s it! You are successfully connected to VPN using L2TP VPN configuration!

You can check if the VPN is working by visiting this website and checking your virtual location:
If you have any further questions or problems, don’t hesitate to contact us at support@seed4.me.
