The VPN is designed to protect your online privacy by encrypting your internet traffic and masking your real IP address. However, even with a VPN enabled, your data may still be exposed due to DNS leaks and WebRTC leaks —two common vulnerabilities that can inadvertently reveal your real IP address and browsing activity.
A DNS leak occurs when your internet requests bypass the VPN tunnel and get routed through your internet service provider’s (ISP) default DNS servers instead of the secure VPN servers. This can expose your browsing history to your ISP and third parties.
A WebRTC leak is another potential privacy risk, particularly in web browsers. WebRTC (Web Real-Time Communication) is a technology that enables real-time voice and video communication in browsers, but it can also reveal your real IP address—even when you’re connected to a VPN.
In this guide, we’ll show you how to check for DNS and WebRTC leaks and take the necessary steps to prevent them while using Seed4.Me VPN for maximum privacy and security.
Before You Start: Verify That Your VPN Is Working
Before testing for DNS and WebRTC leaks, it’s important to confirm that your VPN is correctly masking your IP address. You can do this using an IP detection website to ensure that your connection is routed through the VPN server.
How to Verify Your VPN Connection?
Step 1: Disconnect from Seed4.Me VPN and visit WhatIsMyIP.com, Iplocation.io, IPLeak.net, or any IP location finder website.
Step 2: Note down your real IP address assigned by your Internet Service Provider (ISP).
Step 3: Reconnect to Seed4.Me VPN and select a different country or server location.
Visit the same IP detection website again and check if your IP address has changed to match the VPN server location.
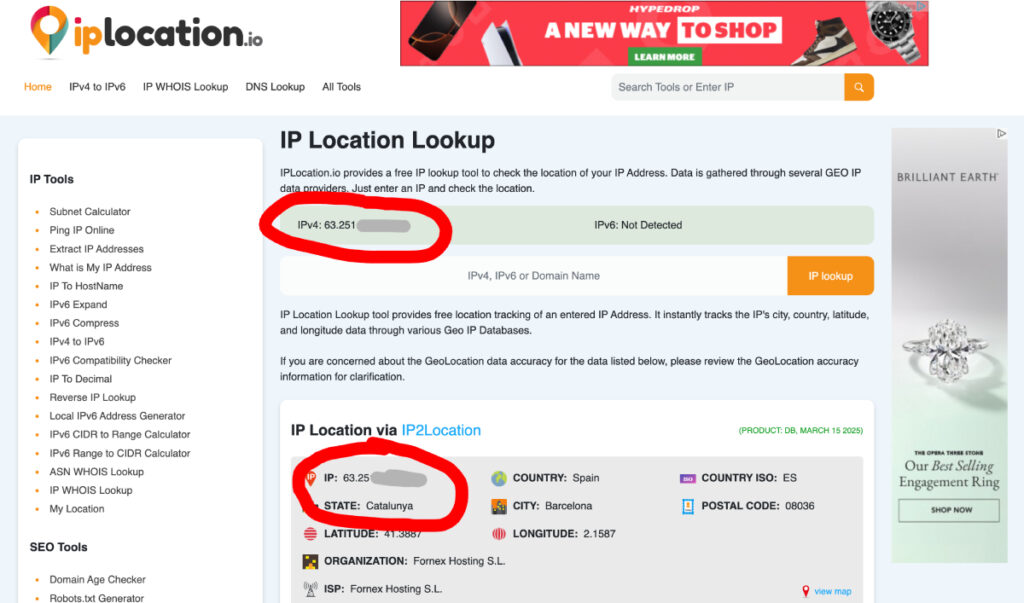
If your IP remains the same, it means the VPN is not functioning properly. In this case, try reconnecting, switching servers, or restarting the VPN app before proceeding with DNS and WebRTC leak tests.
Once you’ve confirmed that your VPN is working, you can continue
How to Check for DNS and WebRTC Leaks
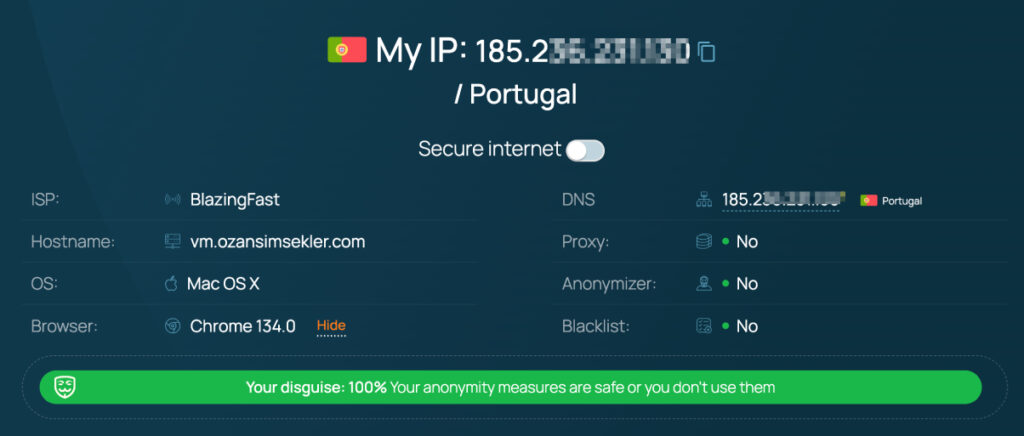
Even when connected to a VPN, it’s essential to verify that your real IP address and DNS requests are not being exposed. Several free online tools allow you to test for DNS leaks and WebRTC leaks easily. Here are some reliable tools:
- IPLeak.net – Displays your detected DNS servers and IP address, helping identify WebRTC leaks.
- BrowserLeaks DNS Test – Offers an in-depth test with additional security checks (For WebRTC use this link: WebRTC)
- Whoer.net – Provides a DNS and WebRTC leak test along with IP and geolocation information.
How to Use These Tools:
- Open Seed4.Me VPN App, choose a location, and connect to the VPN.
- Open any of the above tools in your web browser.
- Run the leak test (choose extended or advanced if available).
- If the test detects any IP address or location from your real ISP, you have a DNS or WebRTC leak . If only VPN-assigned DNS servers are shown, you are safe.
By regularly testing your connection for leaks, you can ensure that Seed4.Me VPN provides full privacy protection. If any leaks are detected, follow the next steps in this guide to fix them.
How to Prevent DNS Leaks While Using Seed4.Me VPN
One of the key benefits of using Seed4.Me VPN is that it automatically prevents DNS leaks—no manual configuration is required. The app ensures that all DNS requests are routed through its secure servers, keeping your online activity private and preventing your ISP from seeing which websites you visit.
What You Need to Do:
✅ Simply connect to Seed4.Me VPN—the app will handle DNS leak protection for you.
✅ Run a DNS leak test (DNSLeakTest, IPLeak.net, or BrowserLeaks) to verify that your DNS is secure.
✅ If the test only shows VPN-assigned DNS servers, you are fully protected.
If you notice a leak despite using the VPN:
• Restart the VPN and run the test again.
• Try switching to a different server location and test again.
• Contact our support team, and we’ll help resolve the issue.
By keeping your VPN app updated and checking for leaks occasionally, you can ensure your online activity remains private and secure at all times.
How to Prevent WebRTC Leaks in Your Browser
Unlike DNS leaks, WebRTC leaks occur within your web browser, not the VPN itself. Even if you are connected to Seed4.Me VPN, WebRTC can still reveal your real IP address to websites unless it is disabled or blocked.
Since WebRTC is enabled by default in most modern browsers, you need to take action to prevent leaks. Here’s how:
Option 1: Disable WebRTC in Your Browser (Recommended Method)
Google Chrome and Microsoft Edge
Google Chrome does not provide a built-in option to disable WebRTC, but you can use a browser extension:

- Install WebRTC Control or a similar extension from the Chrome Web Store or Edge Add-ons Store.
- Enable the extension and make sure that it is turned on to block WebRTC leaks.
Mozilla Firefox
Firefox allows you to manually disable WebRTC:
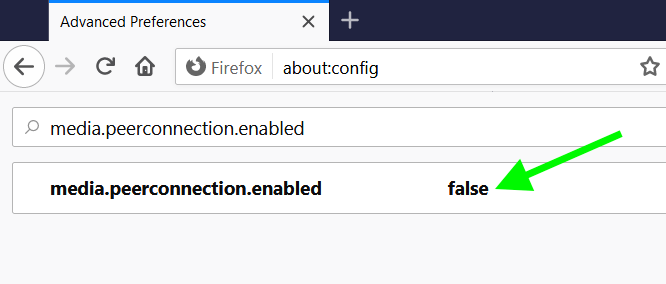
- Open a new tab and type
about:config, then press Enter. - Search for
media.peerconnection.enabled. - Double-click it to set the value to
false(this disables WebRTC). - Restart your browser for changes to take effect.
Safari (Mac & iOS)
Apple has WebRTC enabled, but it limits how it leaks IPs:
- Open Safari Preferences → Advanced → Experimental Features.
- Find WebRTC mDNS ICE candidates and make sure it is enabled (this reduces leaks but does not fully disable WebRTC).

Option 2: Use a Privacy-Focused Browser
If you want full control over WebRTC and other privacy risks, consider using a browser with built-in security features:
- Brave – Has a setting to block WebRTC leaks natively.
- Tor Browser – Disables WebRTC by default for maximum anonymity.
WebRTC leaks are browser-based, so they are not caused by your VPN. However, with a few simple steps, you can block WebRTC leaks and keep your real IP address hidden while using Seed4.Me VPN.
Using Seed4.Me VPN already provides strong privacy protection by encrypting your internet traffic and hiding your real IP address. However, for maximum security, it’s a good idea to take a few extra precautions. Always ensure your VPN is connected before browsing to prevent any accidental exposure of your real IP. Regularly test for DNS and WebRTC leaks using tools like IPLeak.net to confirm that your connection is secure. Keeping your VPN app and device software updated helps patch vulnerabilities and improve security. If your VPN connection drops, consider enabling a Kill Switch (if available on your device) to prevent data from leaking outside the encrypted tunnel.
